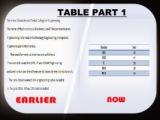
A Table Layout is used to make tables in your application. Which application will u like : One with lots of text paragraphs (boring one) OR the one with short tables providing the same information in tabular format (the interesting one).
People probably used huge paragraphs before but now the scenario has changed .
What do we need ?
What do we need ?
- A Relative / Linear Layout .
- A TableLayout
- A TableRow (depends on the number of rows needed) .
- TextViews
We wiil prepare a Table with 1 row & 1 column .
Step 1 : Drag a TableLayout from Layouts in Palette .
Step 2 : Drag Some TableRow elements from Layouts again and.The TableRow can be dragged as many times as the number of rows you require in your project. (I will drag 2 TableRows as I will display two rows in my Table ) .
Step 3 : Now alter the code of the activity_main.xml file to the code given below .
activity_main.xml
<LinearLayout xmlns:android="http://schemas.android.com/apk/res/android"
        android:layout_width="fill_parent"
        android:layout_height="fill_parent" >

         <TableLayout
            android:layout_width="match_parent"
            android:layout_height="match_parent"
            android:shrinkColumns="*"
            android:stretchColumns="*" >

            <!-- Row 1 with single column -->
            <TableRow
                android:layout_width="fill_parent"
                android:layout_height="wrap_content"
                android:layout_marginTop="10dp"
                android:gravity="center_horizontal" >
                <TextView
                    android:layout_width="match_parent"
                    android:layout_height="wrap_content"
                    android:layout_margin="2dp"
                    android:layout_span="3"
                    android:padding="5dip"
                    android:text="HEADER"
                    android:textColor="#000"
                    android:textSize="18dp" />
            </TableRow>

            <TableRow
                android:layout_width="fill_parent"
                android:layout_height="wrap_content"
                android:gravity="center_horizontal" >
                <TextView
                    android:layout_width="match_parent"
                    android:layout_height="wrap_content"
                    android:layout_margin="2dp"
                    android:layout_span="3"
                    android:background="#FFFF00"
                    android:padding="5dip"
                    android:text="CONTENT OF TABLE"
                    android:textColor="#000000"
                    android:textSize="18dp" />
            </TableRow>

            </TableLayout>

    </LinearLayout>
You will now find the Graphical Layout of activity_main.xml as shown below .
Step 4 : Make a New Folder named drawable in the res folder in your project . Right-click on res from Package Explorer .Then Select New->Folder. Give the name as drawable and its made .
Step 5 : Give a name (header_shape) to the XML File and select shape as Root Element. Then click on Finish . This File will be used to give a custom shape to our Table header .
Step 6 : Now change the default code present in header_shape.xml to the code given below .
header_shape.xml
<?xml version="1.0" encoding="utf-8"?>
<shape xmlns:android="http://schemas.android.com/apk/res/android"
    android:shape="rectangle"
    >
    <solid  android:color="#C0C0C0"/>
    <!-- color of the border -->
    <stroke android:width="2dip"
            android:color="#453"/>
    <!-- for round corner -->
    <corners android:topLeftRadius="7dp"
        android:topRightRadius="7dp"
        android:bottomLeftRadius="7dp"
        android:bottomRightRadius="7dp"/>
    <padding android:left="5dip"
        android:top="5dip"
        android:right="5dip"
        android:bottom="5dip"/>
</shape>
Step 7 : Add the line given below to the TextView of the HEADER to get the desired color as shown in the below screenshot .
android:background="@drawable/header_shape"
You will see the Graphical Layout of activity_main.xml as shown below .
Step 8 : Make changes in MainActivity.java found in src folder from your project .
MainActivity.java
package com.mia.tableproject;

import android.os.Bundle;
import android.app.Activity;

public class MainActivity extends Activity {

    @Override
    protected void onCreate(Bundle savedInstanceState) {
        super.onCreate(savedInstanceState);
        setContentView(R.layout.activity_main);
    }

}
Step 9 : Run the Project .
This type of table format was used in the app Engineering Colleges by Smart Daemon . The screenshot for the app is shown below .
In the next post we will make table with two rows and two columns .


No comments:
Post a Comment